
The Exposure Triangle | Beginning Photography Tutorial
This article also has a permanent spot on my Photography Articles page. Check it out! Before I get into this article, I wanted to tell my thought process in writing it.
I decided I was going to be a photographer when I was 15. That was almost 27 years ago. In that time I’ve gathered a lot of knowledge about photography since it is both my passion and my life’s work. But it is not organized in any neat format in my head, it is just kind of there when I need it. This is great for me, but it poses a problem when I try to explain my thoughts or teach other people about photography, which I’ve wanted to do for a number of years.
This year, I am training my daughter to be a photographer. Whether that is a long-term, forever sort of career or a college job, I don’t know yet. What I do know is that there is so much that I want to convey, that I have a hard time with making it coherent to her. So, when I was thinking about how to give her a solid base to work from, I thought about the things in this article. Hopefully, I can convery the thoughts well enough to help out beginners and even the thought-processes for more advanced amateurs. Feedback is welcome, and I will be happy to update this article if it needs to be clarified!
In the days of yore and film, a camera was a dumb box with a fancy mechanism that controlled the shutter timing. All it did was expose film to light. It didn’t try to do any of your thinking for you.
The bad part of this is that it didn’t help you with making your photographs better. The good part was that you never had to guess what it was thinking.
I’m personally very thankful that modern camera do so much more now, and there is no false nostalgia for the film days from me. The difference between old fashioned film cameras and modern cameras is similar to how a computer is better than a typewriter. The computer allows you to do so much more, but it is certainly easier to figure out how to use a typewriter than it is a computer.
To really start to take control of your photography, it is sometimes a little easier to make your camera back into the dumb box. You don’t have to do this permanently, but it can help with understanding what is going on without all the complications that all the cool new features have added. To make your camera into a dumb box, switch the mode dial to “M” for manual. You may have to look up your camera’s user guide to figure out how to do that.
To get to the point, there are three main controls on every camera ever made that control what a photograph will look like. They are the Shutter Speed, the Aperture and ISO setting. Each does something separate, but changes the way the others move like choreographed dancers on stage.
The Shutter Speed is very easy to understand. It is how long the sensor (or film) is exposed to light. Shutter Speeds are commonly talked about in fractions. Common Shutter Speeds would be 1/30, 1/60, 1/125, 1/250, 1/500, 1/1000, etc. What they are talking about is fractions of a second. So 1/1000 really is 1/1000 of a second that the sensor is exposed to light. You will also notice that moving one position will cause the the number to double or half. So, 1/60 of a second is allowing in half the amount of light to hit the sensor that 1/30 of a second allows. This doubling or halving of the light hitting the sensor is one “stop”.

An example of a slow shutter speed. You can see how the glowsticks are blurred from movement. I also cheated and used a flash to make Tony sharp.
Shutter Speed also controls the amount of motion blur in a photograph. So you have to decide is you want a longer shutter speed and more motion blur, or a faster shutter speed and less motion blur. To give you some ground rules, slower than 1/60 of a second there will be motion blur in normal human activities like walking and dancing. When photographing athletic events, 1/500 might be necessary and race cars would need things more in the 1/2000 range. You can get some very cool effects by using a slower shutter speed. Depending on what you are photographing, you may need a tripod to use slow shutter speeds.
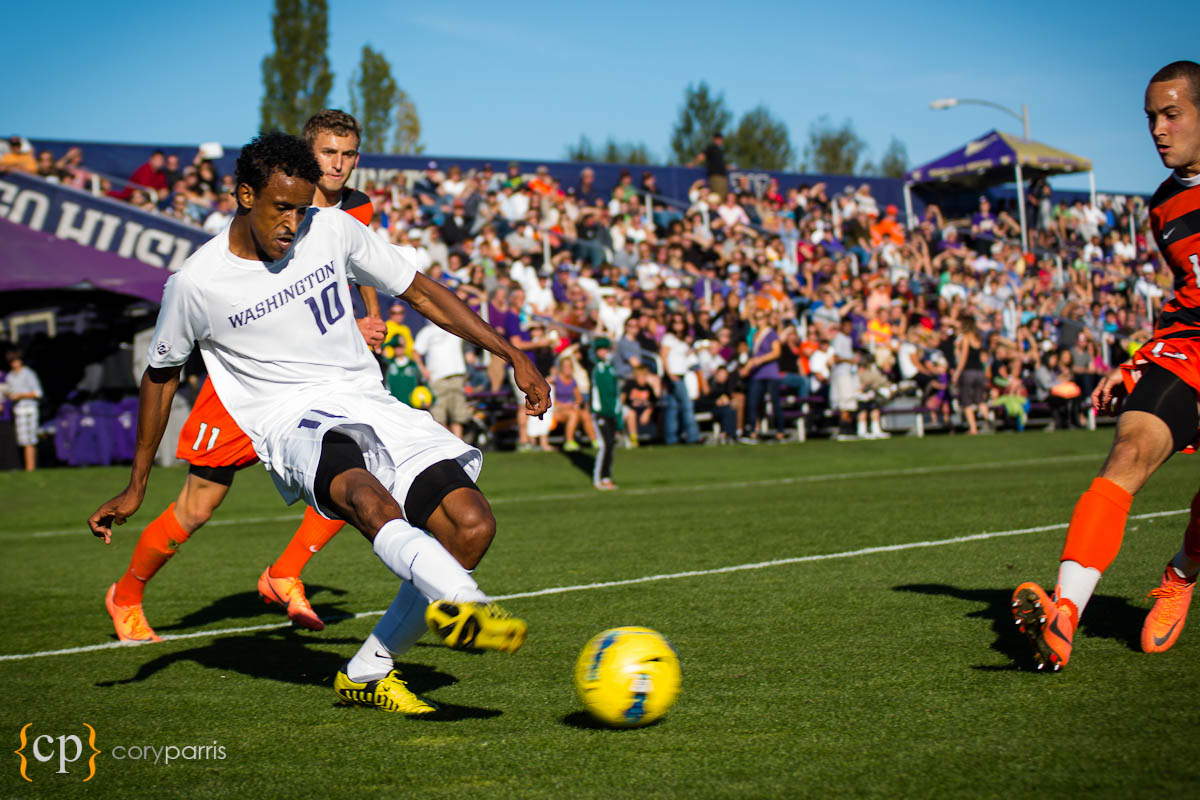
Here is a frame from a UW soccer match. This image was taken a 1/640 of a second. It is sharp except for foot and the soccer ball that still have motion blur at that shutter speed!
The second point on the exposure triangle is the Aperture. Sometimes call the f-stop, the Aperture is the size of the hole in the back of the lens. A bigger hole lets in more light. A very similar idea is that bigger windows let in more light into your living room than small windows.
Common Aperture or f-stop settings would be f1.4, f2.0, f2.8, f4.0, f5.6, f8.0, f11, and f16. Each number is 1.4x the number before it (2x1.4=2.8, 2.8x1.4=4.0, etc.). This is also how the area of a circle works, which is what the f-stop numbers are based on. Each time you increase the diameter of a circle by 1.4, the surface area of the circle is doubled. When you double the surface size of a circle, you let in twice as much light.
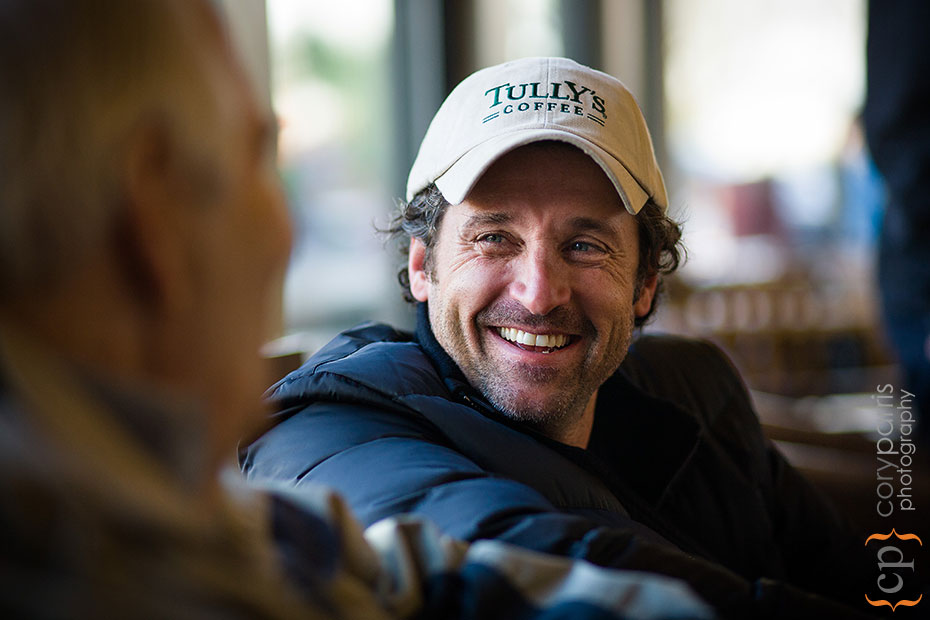
Here is a candid portrait of Patrick Dempsey on the day he bought Tully's coffee. I used shallow depth of field so that he would stand out from the background. This was shot at f1.8.
The creative effect of changing your aperture is that you change how much of your image is in focus. This is called depth of field. The lower the number, the more shallow the depth of field and less of the image is in focus. This is also affected by the size of the sensor. A larger sensor will have less depth of field than a small sensor would have at a given aperture. That is why (if you can get a sharp image) cell phone cameras have almost everything in focus from the front edge of the image to the back.
Here is an example where I wanted a little more depth of field. This was taken at f5.0.
Because they work together, the shutter speed and aperture quite often move together like dancers doing the Tango. As one goes forward, the other goes back. As you increase your shutter speed (letting in less light), you have to open up the aperture to let in more light.
The third piece of our triangle is the ISO. In olden times, this was called the film speed. You would buy a roll of film and it has an ISO rating on it of 100, 200, 400, 800, or 1600. Now with modern sensors, this is just a setting on the camera to tell it how much you want to ramp up the sensitivity. It also comes in much bigger numbers as in 3200, 6400, 12,800, 25,600, and 51,200. And that constantly blows my mind. It is so cool and awesome to be able to make images at those high ISO’s.
The way it works is that each time you double the ISO, you are doubling the sensitivity to light. So ISO 400 requires ¼ the light that ISO 100 does for the same settings. So instead of having to get a tripod out for a shot, you can just change the ISO and hold the camera in your hand. It’s like magic. But it is magic with a cost.
When you increase the ISO, what you are basically doing is adding more power to the sensor (or amplifying) so that it is able to see the image in less light. The side effect of this amplification is more noise in the signal-to-noise ratio. In the images, this comes through as a grain-like texture to the image that looks kind of like you printed the image onto sandpaper. Depending on your camera, this grain can be multi-colored or lined or patterned, which is really ugly. You will have to test out your camera to see what you think your acceptable limits are for each camera.
In our dancing metaphor, the ISO setting would be the choreographer that is telling the other settings of shutter speed and aperture where they should be dancing.
Here are three exposure settings that are all equal in the amount of light that is hitting the sensor.
1/30 at f4 at ISO 100 1/500 at f2.0 at ISO 400 1/2000 at f4 at ISO 6400
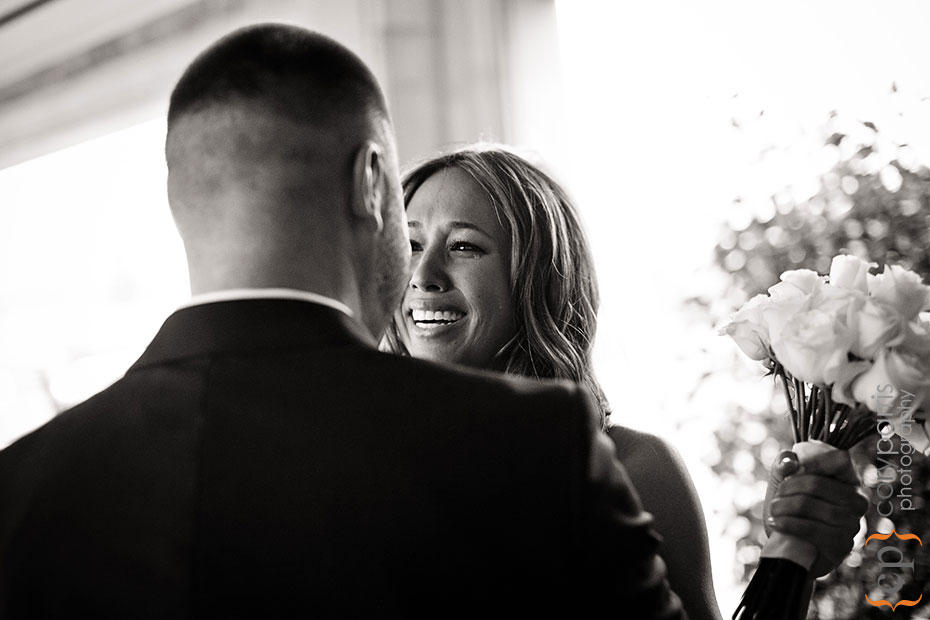
For this image, I set the exposure to be correct for the subject's face, which makes the background completely white and without detail, but her expression and tears are the important part of this image.
Finally, you put all three of these together and you get the “exposure”. The Exposure is exactly what it says. You are exposing the sensor to light for a certain amount of time (shutter speed), with a certain size of window (aperture or f-stop), and with a certain amount of amplification (ISO). How you very the individual pieces of the exposure will affect the final image. Let in more light, the image becomes lighter, let in less and it becomes darker. This is one of the creative elements in photography.
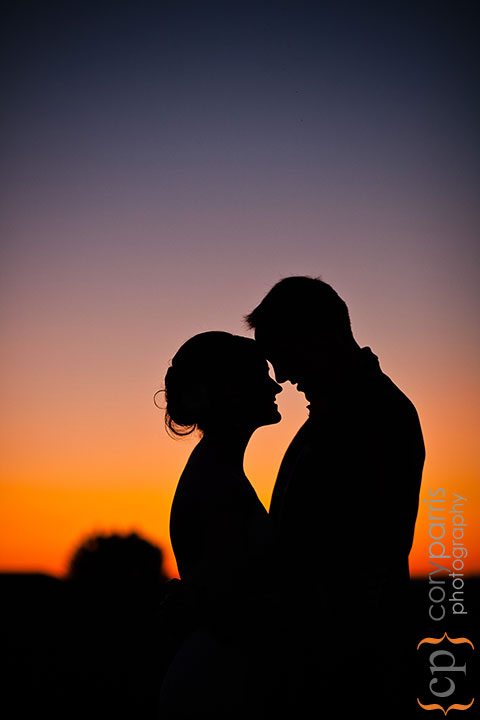
For this image, I set the exposure to highlight the sunset leaving no detail on the couple.
Very cool! Thoughts are welcome!
c@coryparris.com.