
How to Create a Backlit Rain Portrait
Blue raindrops. How to create a beautiful backlit portrait in the rain with a flash.
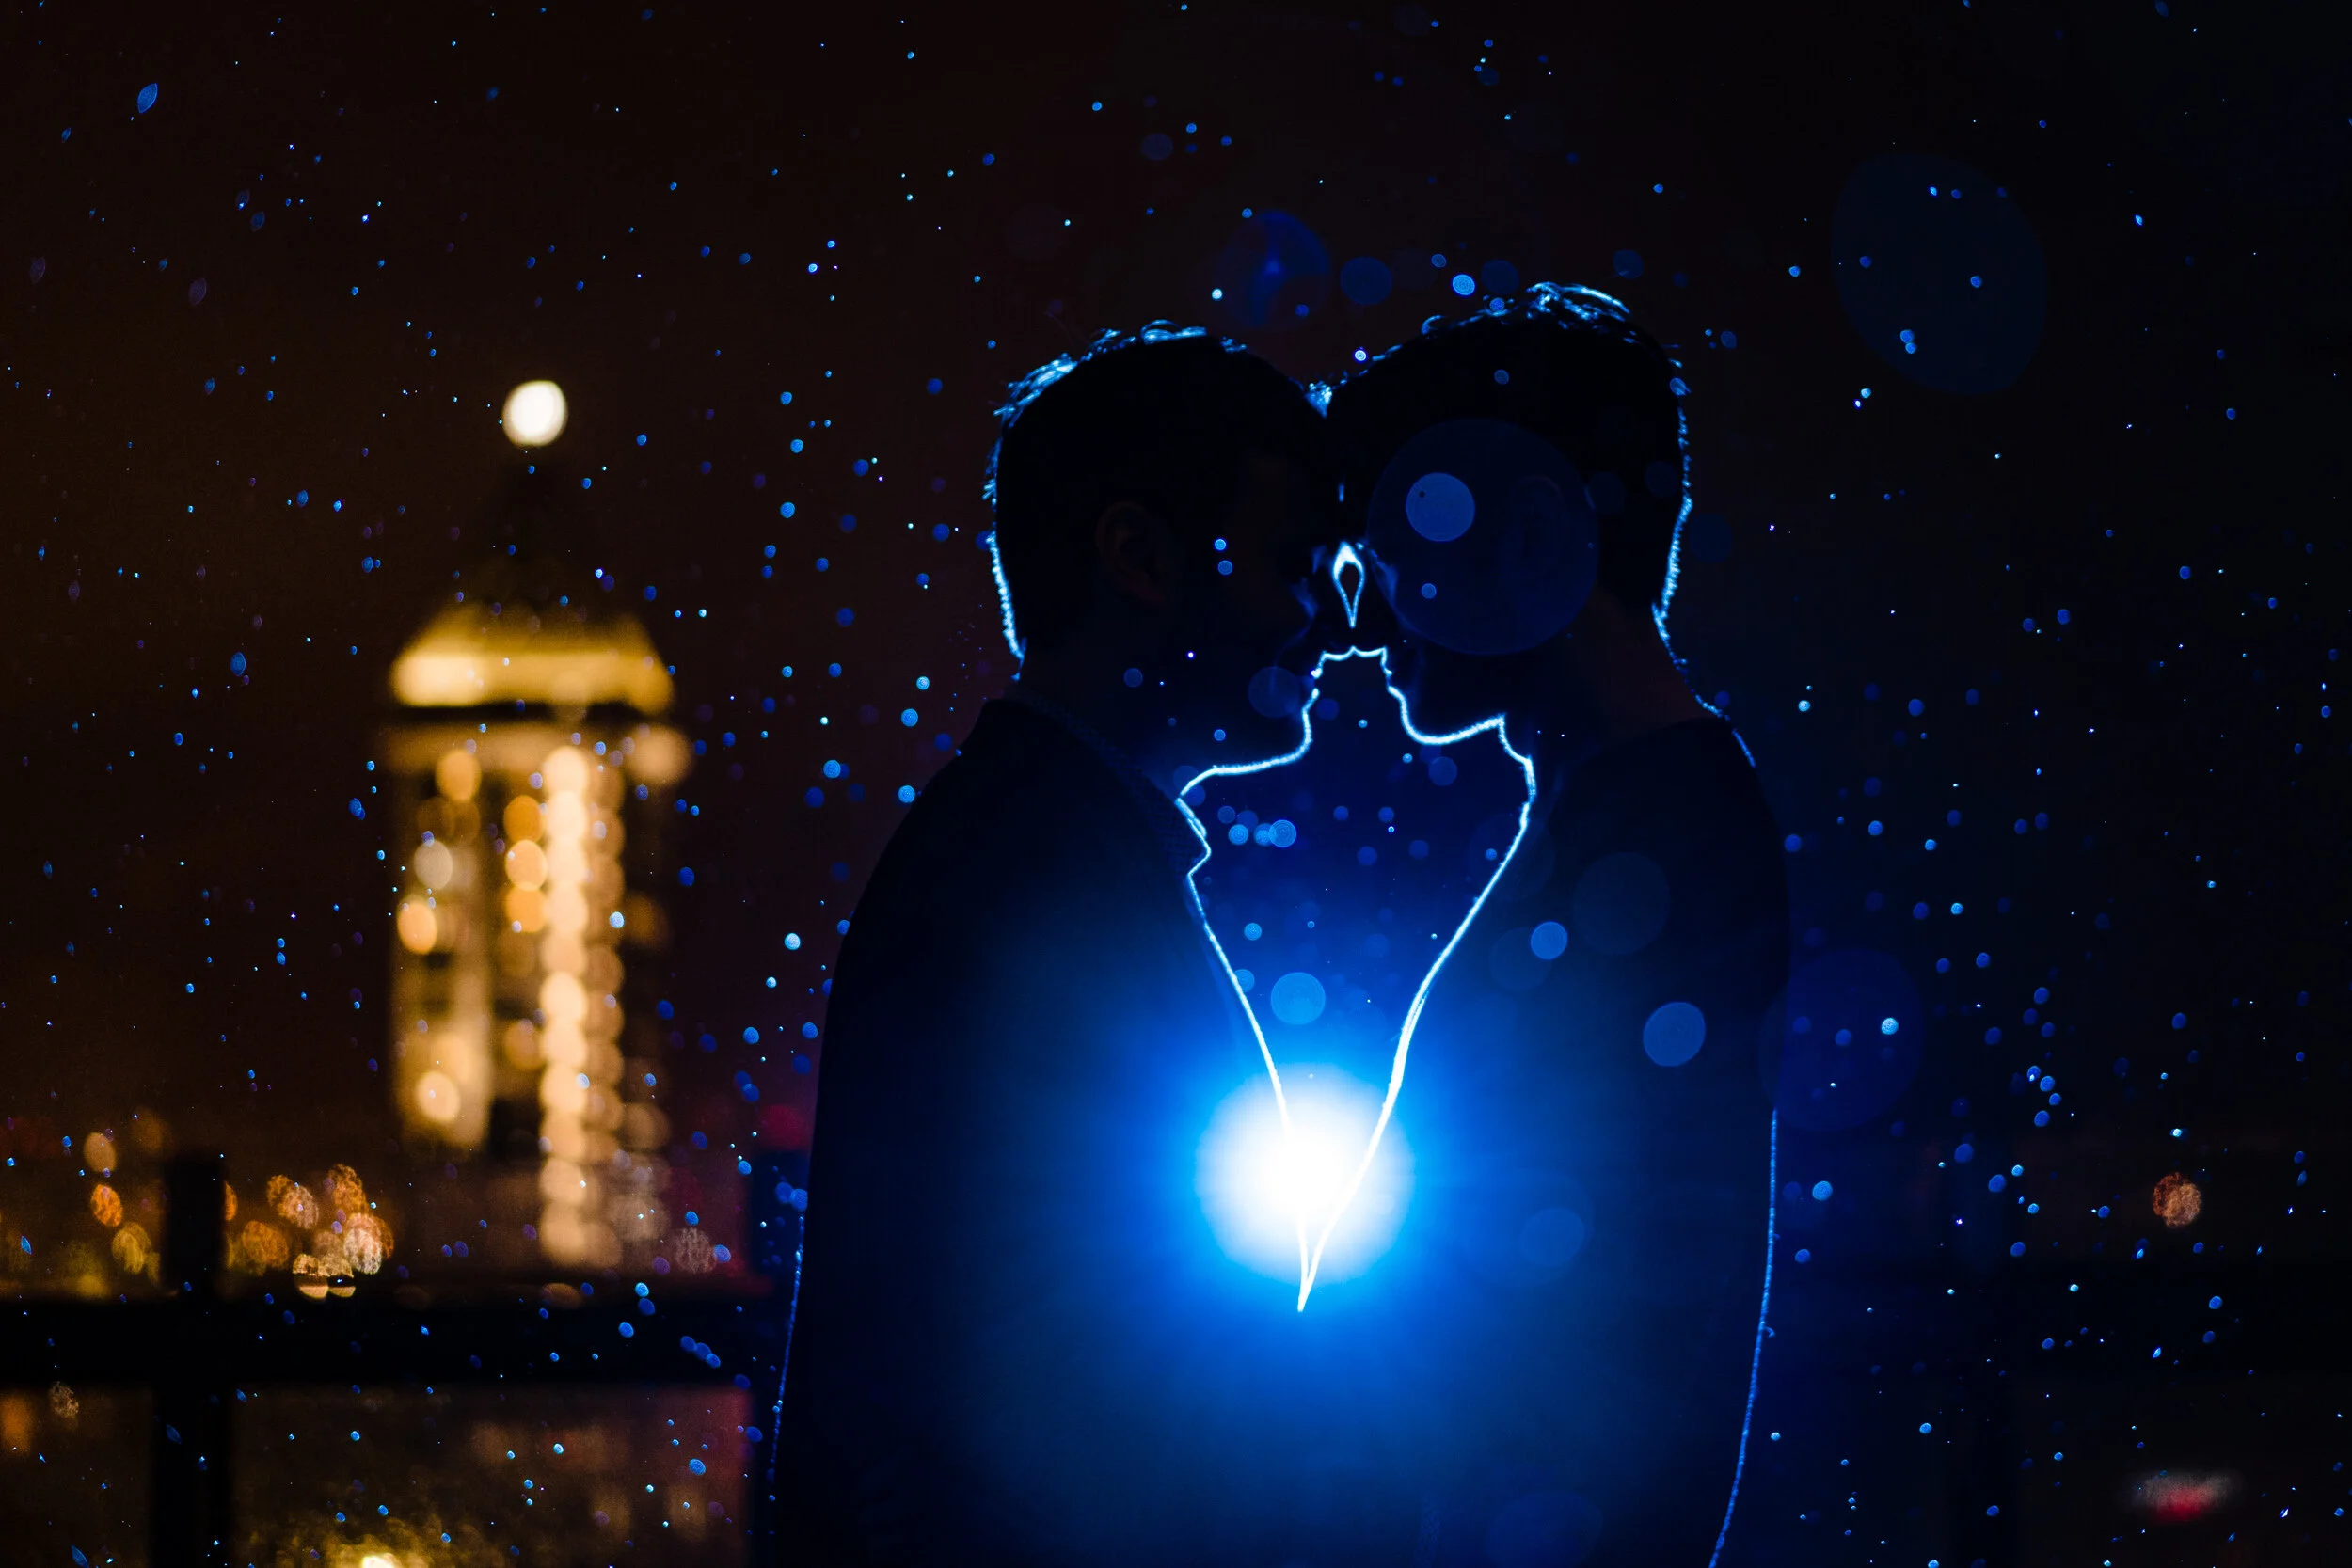
Blue Raindrops
My approach to photography has always been to work fast and to push myself beyond what I know will work. After 30 years of pursuing photography, I can usually find a way to make things work, but the great thing about photography is that it is always a challenge.
As odd as it sounds, I have been a photographer in Seattle for nearly three decades and have rarely shot portraits at night in the rain except for a couple of times. The iconic image that many photographers produce is a backlit image with an umbrella. I wanted to do my own, slightly different take on the rain shot.
For starters, no one had an umbrella because we are from Seattle. Everyone in Seattle seems to own several umbrellas, but we don’t take them with us most of the time. On a typical rainy day in Seattle, it rains lightly for 10 minutes and then it stops for a couple of hours. So we only have umbrellas for when we are planning on standing outside, like at a kid’s soccer match.
I have a process that I go through when I am adding flash to a scene. The first is that I think of the image in layers. I don’t get too complex with this, but every image has a background and a mid-ground (the subject), and sometimes a foreground. I start with how I want the background, then the subject (mid) and then adjust if there is an opportunity to use a foreground element, but I did not really use that in this image, but the raindrops in front of the couple did add a bit for the foreground.
The actual setup of this shot was super simple. First I found the background that I wanted, which is the view of the historic Smith Tower just south of downtown Seattle. Then I set the exposure for the background manually. I think it helps a great deal to set up the background exposure before you add any flash to the scene. It lets you think about one thing at a time.
Next, I set up one flash directly behind the couple pointed towards the camera. The light coming from this angle does two things. It rims the couple and it illuminates all the water droplets. Anytime you want rain to be obvious in an image, it needs to be backlit so the droplets are brighter than the background. I also wanted to create a little bit of drama to the image, so I added a blue color to make the couple pop from the background. Most of the time when you are using a flash outside of a studio, you need to make sure the ambient lighting is not impacting the image by casting unwanted light on the subject. That wasn’t a problem for this image since it was a dark, winter night.
Next, I positioned the couple in front of the flash, and turned on the flash trigger. Then I set the power of the flash on the trigger. Probably something pretty low like 1/32.
Then, it was just a matter of moving them and my point of view around a little to get just the right capture.
Technical Information
For this image, the settings were ISO 800 f1.8 and 1/60 of a second on my Sony A7III with my Sony Zeiss 55mm f1.8 lens. I love the 55mm for portraits. I like the close working distance it allows between me and my subjects while providing a flattering look for most clients and extraordinary image quality. The flash used is a Flashpoint Li-Ion R2 with a MagGrip, blue MagGel, and a clear plastic bag covering it to protect it from rain. It is sitting on a Manfrotto retractable light stand and MagShoe. The flash trigger is a Flashpoint R2Pro. I am a huge fan of MagMod products. I own nearly the entire set of gear and I am considering buying all the pieces I don’t already have.
