
Behind the Lens: Engineering an IT Professional’s Portrait
John, an IT Professional, photographed for a magazine using a fun and technical lighting setup.
I recently had the pleasure of photographing John, an IT professional, for a magazine feature. While the final image needs to stand on its own, I find that explaining the "how" can be just as interesting as the "what." This session was a great opportunity to lean into some core lighting principles I’ve used throughout my career in Seattle.
The Philosophy: Building from the Back
When I approach a new composition, I don’t start with the subject. I build the photograph from the back to the front:
The Background: This sets the stage and the mood.
The Midpoint: This is where the subject—in this case, John—lives.
The Foreground: An optional layer used to create depth or frame the scene.
By layering the image this way, I can ensure the subject doesn't just sit "on top" of a background but feels integrated into a three-dimensional space.
The Four Pillars of Lighting
To get the lighting right, I evaluate four specific variables. If you understand these, you can essentially "backwards engineer" almost any photograph you see:
Quantity: The raw amount of light hitting the sensor.
Quality: Is the light soft and enveloping, or sharp and delineating?
Color: Light temperature matters. For context, ungelled flashes sit at about 5000K (daylight), while tungsten is closer to 3000K and deep shade can hit 7000K.
Direction: Where the light originates and where the shadows fall.
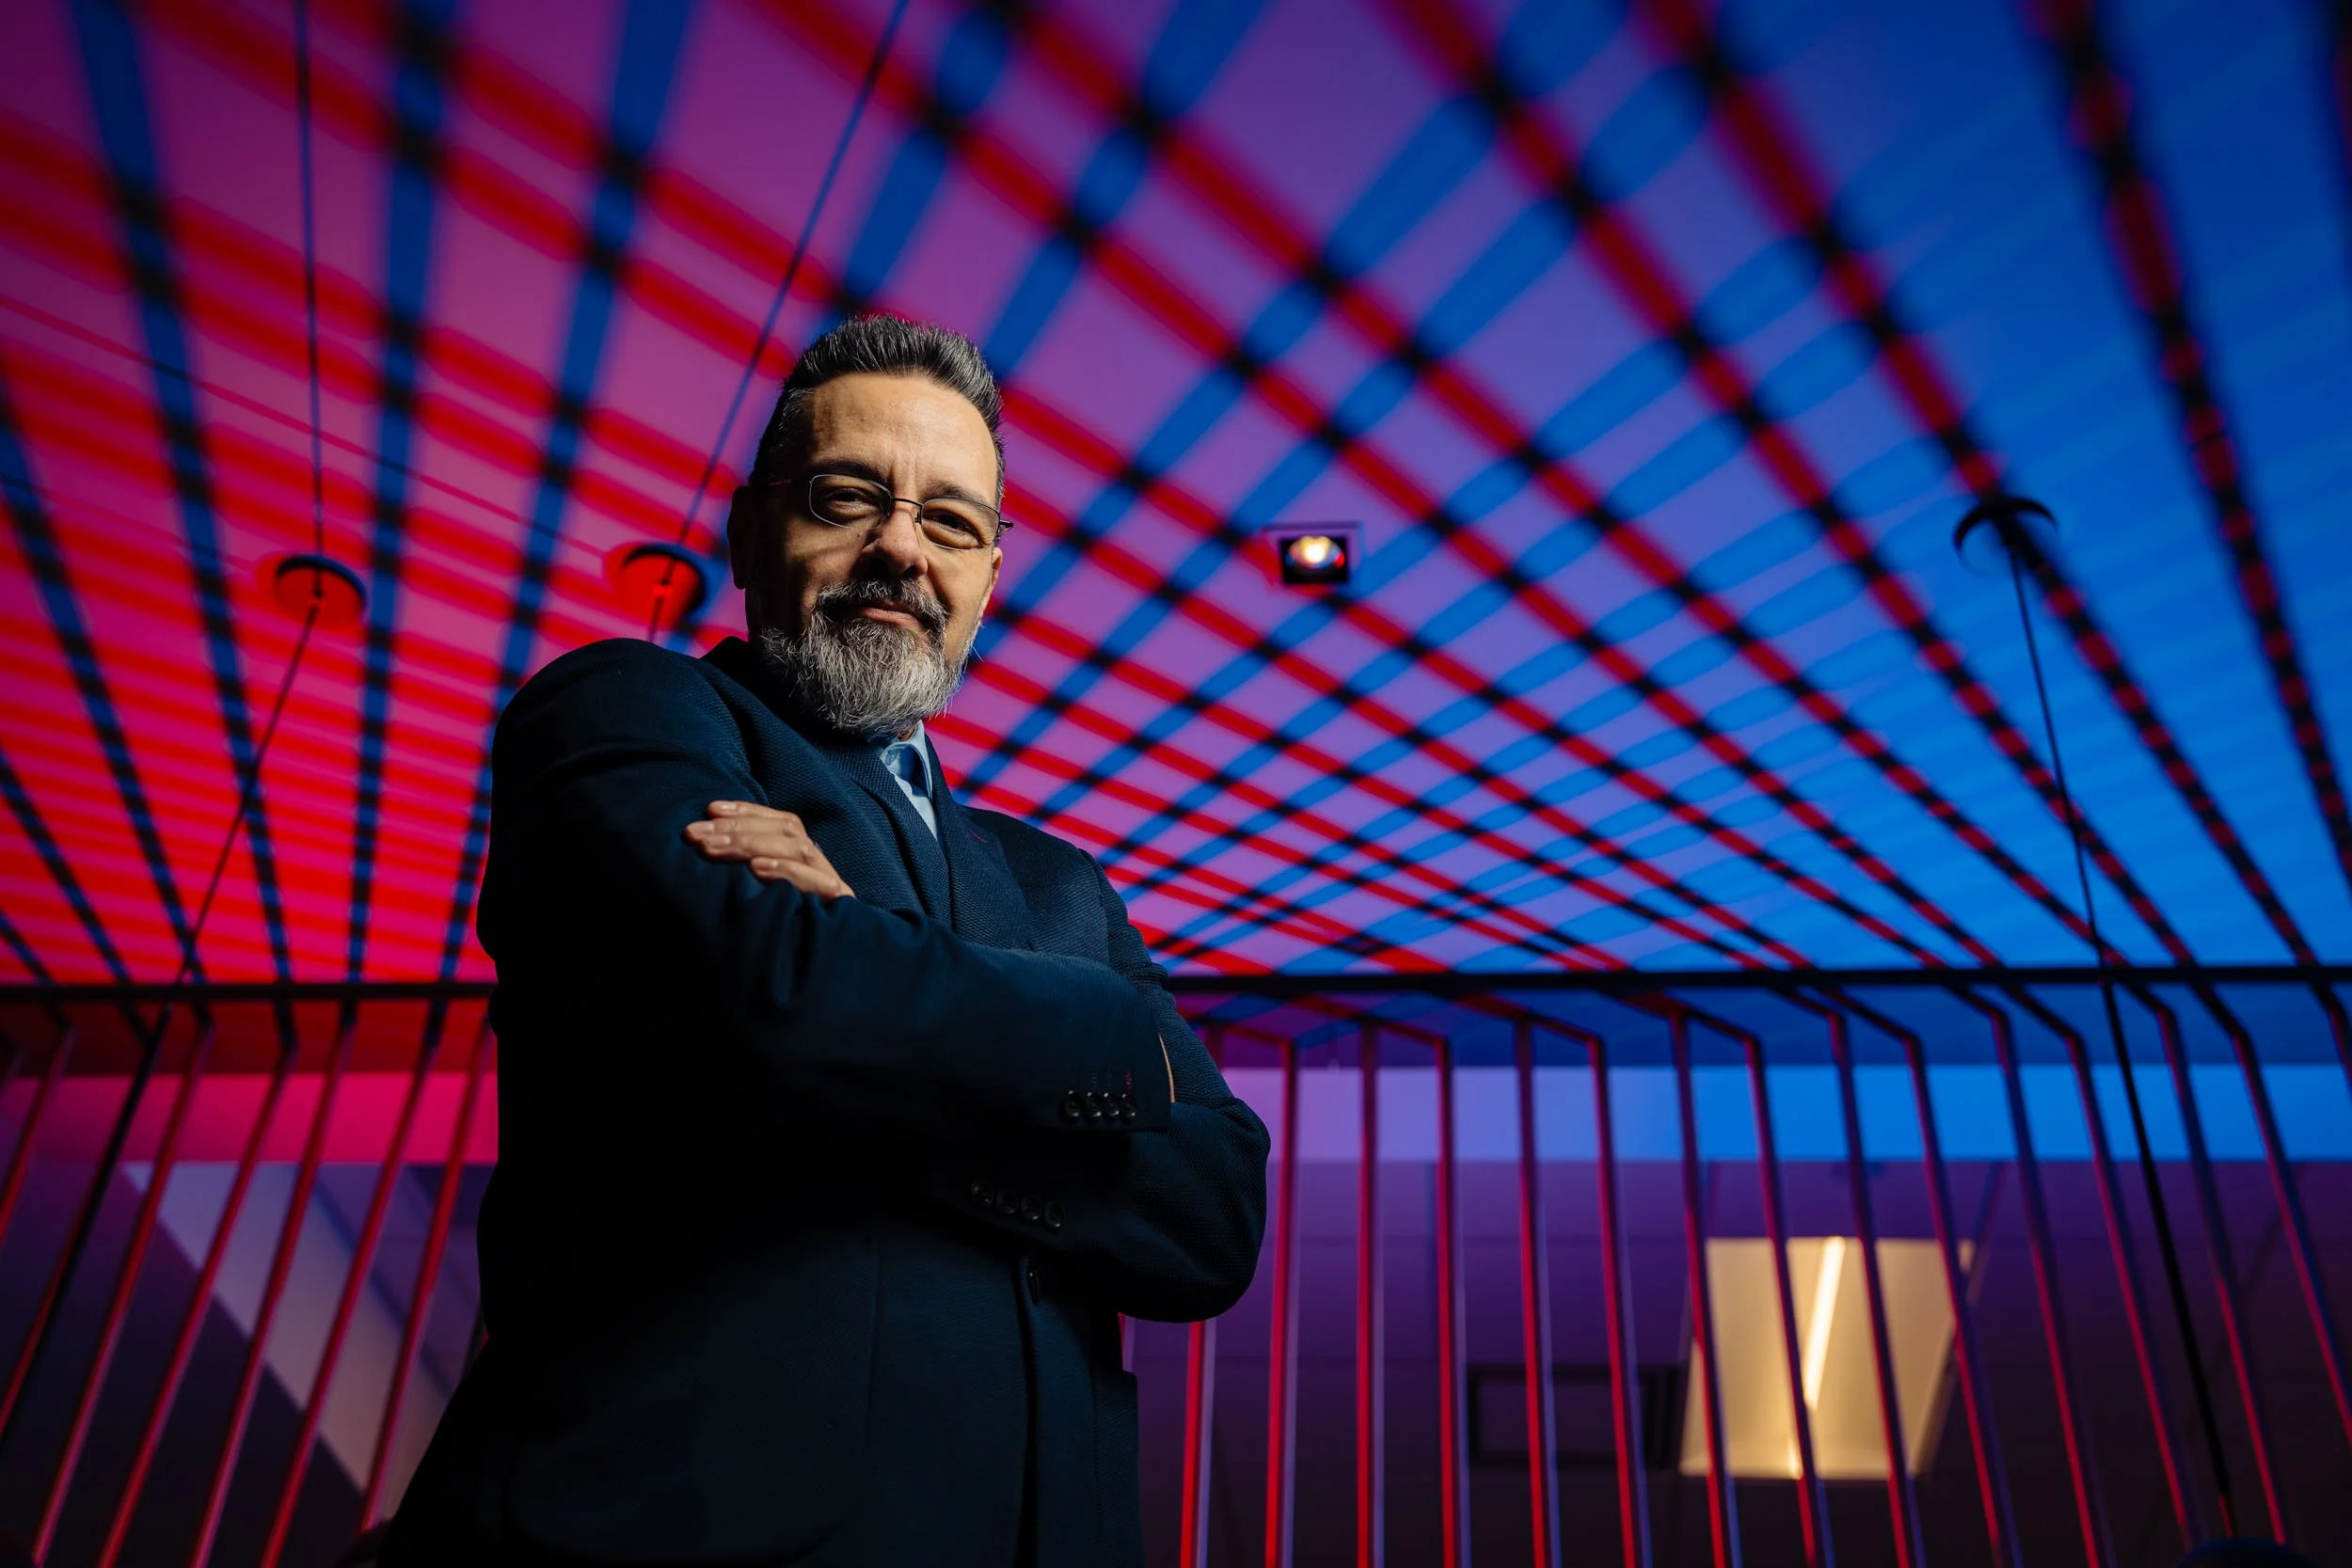
The Execution: Red, Blue, and Metal
For John’s portrait, I wanted to play with the office's existing geometry. I started with the background, placing two flash units behind him. I aimed them up and inward through a series of vertical metal bars that were part of the office decor.
To add a technical, modern edge, I used a red gel on one flash and a blue gel on the other. I left these flashes undiffused; the "hard" quality of the light helped define the sharp, rhythmic lines they cast across the ceiling.
Finally, I moved to the midpoint. I used a small softbox with a grid to light John. The grid was essential here—it allowed me to illuminate his face and shoulders while preventing light "spill" from washing out the vibrant colors I had just established in the background.
It was a rewarding project that balanced technical precision with the goal of telling John’s professional story. It’s these small details in lighting and layers that turn a standard headshot into a compelling narrative.